Pages

Sunday, June 16, 2013

Ingredient 22 - Radishes

This week I made roasted radishes.  I originally planned to make a salad of pea shoots and thinly sliced radishes but that plan fell apart when the market sold out of pea shoots.  However, my interest in radishes was rekindled when I discovered they could be cooked. 

The radish, Raphanus sativus, is a root vegetable whose origins predate the Roman Empire.  Because wild radishes are similar to turnips and mustards, it is believed that they were domesticated in Western Asia and Europe.  Today radishes are grown all over the world, anywhere with abundant sun and moist fertile soil.  Many varieties become available in spring or early summer, but some are planted for winter harvest.  The latter being larger and more pungently flavored.  When purchasing, look for firm bulbs and crisp green leaves.

Roasted Radishes and Carrots
Courtesy Melissa d'Arabian 
Serves 3 to 4
1 bunch of small to medium radishes
12 baby carrots
1 tbp olive oil
1 tsp thyme
1/2 a lemon
Salt and black pepper

06-16-2013 009

Begin by pre-heating the oven to 450 degrees and lining a baking sheet with aluminum foil.  While the oven is heating, trim and wash the radishes.  The radishes I bought were quite sandy, so I spent a good 5 minutes thoroughly washing them.

06-16-2013 017

Place the radishes and carrots in a bowl and toss with the olive oil, salt and pepper, and thyme.  Once coated, place on the veggies on the foil lined baking sheet and bake for 20 minutes.

06-16-2013 03406-16-2013 037

After removing the veggies from the oven, squeeze on some lemon juice and plate.  I served my radishes with crock pot pork tenderloin and yellow zucchini.

06-16-2013 052

I was expecting to love this recipe, but I didn’t.  The radishes were too bitter for my taste, especially the smaller radishes.  I thought they would sweeten with cooking.  I won’t repeat the recipe, but I would be open to trying a recipe that includes some form of added sugar.  

Monday, June 10, 2013

Ingredient 21 – Swiss Chard

Until recently, I had no desire to cook or eat Swiss Chard.  As a child my father touted its hardiness and nutritional value.  An avid gardener, he probably grew and cooked it for our family.  However, I only remember the berries, tomatoes, sweet peas, and bumper crops of garlic.  My dad grew so much garlic one year, all visitors to the house went home with a doggie-bag full of garlic.

My feelings towards chard changed last week when I was at my neighborhood farmer's market.  I was seduced by the rich green leaves and the brightly colored stalks.  I knew Swiss Chard was super nutritious, a good source of vitamins K, A, and C and high in polyphenol antioxidants; I didn't know how visually appealing I would find it.

Swiss Chard, Beta vulgaris, belongs to the same family as the beet.  Swiss chard is a misnomer.  This green is from the Mediterranean and remains popular in the region's cuisine.  19th century seed producers added Swiss to the name to distinguish it from other varieties of chard.  Swiss chard is known for being slightly bitter.  Young chard can be eaten in salads but mature chard should be cooked to neutralize the bitterness.  When purchasing chard, look for leaves that are bright green and crisp.  Avoid leaves that have little holes or yellow or brown marks.

I prepared my chard using a Martha Stewart recipe.  I have been perusing her site a lot lately and am pinning numerous recipes.  Her website is a goldmine.

Sautéed Swiss Chard
Serves 4
1 large bunch Swiss chard
1 tbp olive oil
4 garlic cloves ( I used 2 very large cloves)
2 teaspoons sugar
1 tablespoon red-wine vinegar
Salt and pepper

06-09-2013 008

Begin by washing and chopping up the chard.  Remove the stems from the leaves.  Cut the stems into 3/4 inch pieces and the leaves into 1 inch pieces; don't worry if the pieces are exact, guesstimate. 

06-09-2013 018
06-09-2013 035

Once all the chard is prepared, heat the olive oil in a Dutch oven or large covered skillet, medium heat.  Peel and dice the garlic and cook in the heated oil for a minute or two.

06-09-2013 036

Next, add the stems and cook for 5 minutes, string frequently.  Add half the leaves, sprinkle on 1 teaspoon of sugar, stir, and cover for 4 minutes.  Once the time has elapsed, add in the rest of the chard and repeat the process, letting the chard cook for approximately 8 minutes.

06-09-2013 042 06-09-2013 047
06-09-2013 055
06-09-2013 059

Remove the chard from the heat and drizzle with the red wine vinegar, salt and pepper to taste, and enjoy.  My chard was served with rotisserie chicken from El Pollo Rico.

I really liked the chard, it wasn't bitter at all.  I think this dish is going to make its way into my regular dinner rotation.

Tuesday, June 4, 2013

I Tried Biscoff Spread

Biscoff spread is Europe's alternative to peanut butter, according to producer Lotus Foods.  However, it contains no nuts. It does have the consistency of peanut butter but is largely comprised of ground up Biscoff Cookies, the cookies you get when you fly Delta.  FYI, Biscoff spread was invented by Els Scheppers in 2007 as part of a reality TV competition in Belgium.

I first learned of Biscoff spread from the blogosphere.  However, I received two free jars when I visited the Belgium Embassy this May during the yearly embassy open houses.  The product distributor recommended placing it on ice cream as a topping.  The Biscoff website says you can also enjoy it with apples or on toast.  I went with the distributors recommendation and tried it out on vanilla ice cream.

 06-04-2013 002
06-04-2013 009

Biscoff tastes exactly like molten graham crackers and its flavor mixed well with vanilla ice cream.  The spread didn’t stir into the ice cream as well as I would have hoped.  However, my kitchen was warm so my ice cream melted quickly.  I wouldn’t put Biscoff on toast, but I seem to enjoy eating it out of the jar.  If you like eating cookie dough, you will probably like Biscoff.    

Wednesday, May 29, 2013

Ingredient 20 – Morel Mushrooms

This week I had a really hard time deciding what ingredient to feature.  I had many good options after visiting the DuPont Circle Farmer's Market on Sunday.  The DuPont market is really fantastic; there are numerous vendors and an abundance of wonderful products.  After some debate and several purchases, I decided on morel mushrooms.

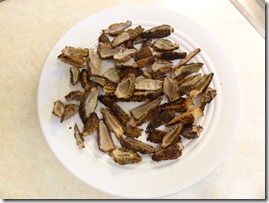
05-29-2013 013

Morel mushrooms are cone-shaped and have a sponge-like or honeycomb cap.  They range in color and size.  Darker morels have a smokier, nuttier, and earthier flavor.  Wild morel mushrooms are available between April and June, but cultivated morels can be purchased year-round.  It is best to consume morels as soon as possible after purchase.  However, If not using immediately, place the mushrooms in a paper bag and store in a cool location for up to 48 hours.  Never store morels in plastic, they need to breathe.

Morels should be cooked, not eaten raw.  They can be cooked in butter and enjoyed alone or added to dishes such as soup, quiche, pasta or risotto.  However, it is best to include them in simple dishes so their flavor is not lost.    

Morel and Asparagus Sandwiches with Poached Egg
Adapted from Martha StewartServes 2-4
2/3 cup ricotta cheese
2 tablespoons unsalted butter
1 tablespoon olive oil
1 bunch asparagus
4oz small morel mushrooms
1/2 cup chicken stock
3 tbp heavy cream
4 tsp finely chopped fresh flat-leaf parsley
1 tbp fresh lemon juice
4 eggs
4 slices rustic bread
Salt
Pepper

05-29-2013 005

Begin by cleaning and slicing the morels.  There are differing schools of thought on how to clean these mushrooms.  However, many authors call for limited use of water during cleaning.  I quickly rinsed my morels in cool water and laid them to dry on a paper towel.  Gently wiping the mushrooms with a damp paper towel was another commonly cited method.  Once dry, I sliced the mushrooms in halves or quarters, depending on the size.

05-29-2013 015 05-29-2013 020

While the morels are drying, rinse and trim the asparagus, rinse and chop the parsley, and place the ricotta in a small bowl and season with salt and pepper.

05-29-2013 017 05-29-2013 026

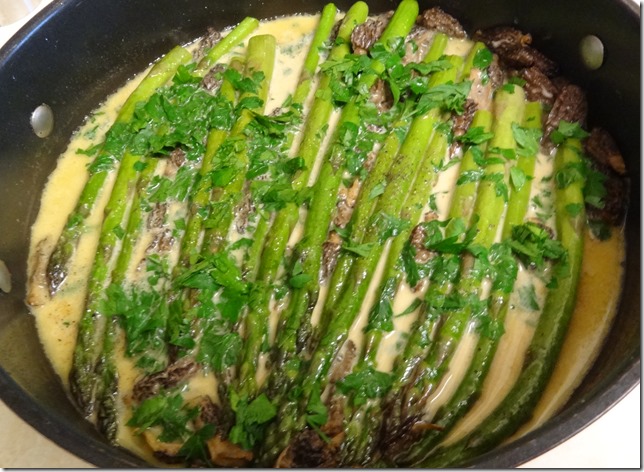
Place the butter and oil in a large sauté pan over medium heat.  Once the butter has melted, add the asparagus and cook for 1 minute before adding the morels and chicken stock.  When the stock has come to a simmer, cover and cook for 2 minutes.  After 2 minutes, uncover and add the cream and cook and additional 1 to 2 minutes.  Add the lemon juice, parsley, and a pinch of salt and pepper.  Cover and remove from heat.

05-29-2013 030
05-29-2013 037

To poach the eggs, bring 3 to 4 cups water to a gentle simmer in a shallow saucepan or skillet.  (To produce a somewhat neat looking egg you will need a mold to hold the egg as it cooks.  I use a metal cookie cutter.)  Place the mold in the pan and pour the egg inside the cutter.  Cook the egg for approximately 3 minutes.  Keep an eye on your water, don't let it boil.  Repeat until all eggs are cooked.

05-29-2013 040

While the egg is cooking, toast the bread and spread the ricotta mixture on top.  Place asparagus spears and morel sauce on top.  Once cooked, remove the egg from the water with a slotted spoon and place on top of the asparagus.  Martha Stewart recommends placing the eggs on a paper towel lined plate to dry before plating. I tried this technique but found it to be a royal pain in the butt.  I would gently dab away any excess water with a paper towel when transferring the egg from the pan.  Once plated, dig in and enjoy. 
  
05-29-2013 03805-29-2013 04305-29-2013 045

Overall, I enjoyed this dish.  The ricotta, egg yolks, and asparagus complemented each other nicely and the morel sauce had a nice earthy flavor.  As for the morels themselves, I wasn’t wowed.  I would be curious to try morels simply cooked in butter. 

I am a bit frustrated that my poached eggs look nothing like the ones I get in restaurants.  I think I need some special tools if I am ever going to produce a picture perfect poached egg.

Tuesday, May 21, 2013

Ingredient 19 - Brandy

This weekend I made sangria for Dave's graduation party.  Not gonna lie, I love sangria because it is refreshing and not too sweet.  Until recently, I had no idea that that traditional red wine sangria included brandy.  I thought sangria was made with just wine, juice, and fruit.  

Before making sangria, my knowledge of brandy was pretty much non-existent.  If someone mentioned brandy, my first impulse was to sing the chorus of Brandy by Looking Glass, not exactly informative.  However, brandy or brandywine, is a distilled wine or fruit mash that contains 35 to 60% alcohol by volume.  It is produced in most countries that also produce wine.  Cognac is brandy from the Cognac region of France that has been double distilled in pot stills.  Brandy is often consumed as an after dinner drink, and is the alcohol ignited when preparing flamed desserts, such as cherries jubilee.

Sangria for a Crowd
Adapted from Emeril Lagasse  
2 (750-ml) bottles red wine – My local wine shop suggested Merlot.
1/2 cup brandy
1/2 cup orange flavored liqueur
1 cup orange juice
1/2 cup sugar
1 orange
1 lemon
1 lime
2 apples
2 (750-ml) bottle sparkling water

05-21-2013 017

Begin by preparing the fruit.  Peel, core, and slice the apples.  An apple slicer makes coring easy but you may need to use a knife to clean up the pieces.

05-21-2013 02505-21-2013 032

Next, thinly slice the citrus, discarding the ends and removing any lemon seeds.  Place the sliced fruit, orange juice, sugar, and liquors in a large glass jug or punch bowl   Pour the red wine in the container and mix gently with a large spoon.  Refrigerate the mixture for 2 to 3 hours.

05-21-2013 040 05-21-2013 051

When ready to serve, remove the sangria from the fridge and pour in the sparkling water, again stirring gently with a large spoon.  Serve the sangria over ice.

05-21-2013 056

This sangria was easy to make and delicious.  It was a hit at the party and I will be making it again.  I wasn't sure if the sparkling water would make the sangria too bubbly but I didn't even notice its presence.  I am looking forward to trying my hand at white sangria over the summer.